I've been neglecting my blog but have been working away on some projects. I've posted scans and a brief description of each.
Background ATC's
For the Background ABC technique I used the Pounced Ink technique to create the background for this ATC. I crumpled up a piece of plastic wrap and pounced in on the ink pad, then on the paper. The is is a collage stamp from Stampin' Up.
I made this card for an African swap for an internet group (artforthecreativemind) using a new embossing folder from Cuttle Bug called African Batik - what a good excuse to buy a new folder to add to my stash! I carefully applied metallic ink on the raised areas and added the palm tree and the lion image (Sampin' Up) along with some raffia.
My friend Bonnie (check out her blog - Google craftiblog on Wordpress) taught me how to make the paper flowers. We spent an evening making the roses, then assembling the card. I knew that I had to practice, so I made a bunch more in the following days, and found a few other ways to make flowers. Check out Bonnie's blog - craftiblog on Wordpress.
These are a few flowers I made on my own - great messy fun!!!
I found this product at Joann's in the clearance bin - its strips of fabric stitched down the middle. Of course, I could make this myself, and probably will, but the price was right and I wanted to try my hand at fabric flowers.
Here's the result - I distressed them with Distress Ink to create a vintage look.
And here is a set of tags I made for a swap.
I also found another way to make the flowers using concentric punches.
Oriental July Swap - Lanterns
This month's theme was lanterns and the colors black and gold. I used Distress Ink markers to color the lantern and a Cuttle Bug folder to emboss the gold paper.
Anniversary Cards
We send a lot of greeting cards to family and friends, especially for birthdays and anniversaries. Dick requested more anniversary cards, so here are a few that I made.
Here's the new Hero Arts bird collage stamp that I bought in June.
The three panel cards were made with DSP and some purchased embellishments.
Road Trip to Appleton Card Class
My friends Chrissy and Mary from Mukwonago and I drove to Appleton to take a card making class at The Paper Cut, a business that supplies quality paper to stores and other businesses as well as selling at Stamp/Scrap shows around the country. A few times a year they open the warehouse for a big sale. And, on the night before the sale, they offer classes and early entry to the sale. We took a great class using some of their specialty papers and some interesting techniques. I didn't quite finish up that night but have all except one completed. Take a peek:
Silhouette ATC's
One of my groups has an ATC swap every month - July's theme was "silhouettes." I had purchased a wonderful set of Jane Austen stamps and dies a few months ago and used them to create these.
Card Club with Ardi and Carole
We try to get together once a month to make cards - these are the July cards. Mine is the one on the left, Ardi's is in the middle, and Carole's in on the right. Carole applied white glue on white cardstock and let it dry. We applied blue and brown Distress Inks over the dried glue which created the look of clouds and texture to the grass. Very clever idea!
July Shoebox
Another group of friends and I also get together every month. Here are the July creations.
Bonnie created the vase using porcelain clay and brought enough for each of us to make a flowery card. We created the textured background using the ScorPal. The leaves are an assortment of die cuts, punches, and hand cut and crimped. The flower was a purchased silk flower which we took apart and reassembled
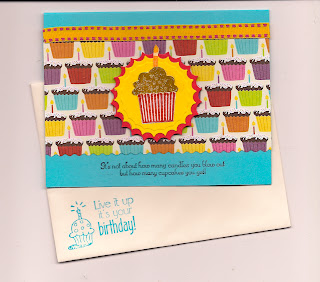
Chrissy brought a colorful BD card design using printed paper, some die cuts and ribbon. I love the companion stamp for the envelope!
Jane's card featured punched butterflies and purchased paper roses. We stamped the brown background with metallic inks - hard to see here but lovely. The card was finished off with punched borders, ribbon, and a special antique button from Jane's grandmother's button jar.
Here's that bird stamp again! I showed the gals an easy background using Distress Inks and watercolor paper spritzed with water, then dried with a heat tool. We stamped the bird and colored in areas with Distress Markers.
Thanks for taking the time to peruse my blog.


