Showing posts with label techniques. Show all posts

Wednesday, December 28, 2011

ATC Background Techniques: "I"

     I love creating backgrounds so was excited to join an ongoing swap creating backgrounds using different techniques.  A group of six is making an ATC every month for each of the participants.  Rather than randomly sending any technique, my friend Carole who organized this swap (she is the background Queen!) decided that we should go through the alphabet, one letter at a time.  I think some of the letters might be a challenge!


Interference Resist with Alcohol Ink

     This month we are creating with the letter "I" in mind.  I found a technique in the wonderful book "Texture Effects" by Nancy Curry.  It is a simple but beautiful technique.  Simply randomly sprinkle powdered pigments such as Perfect Pearls on black glossy card stock then apply alcohol ink using a sponge or felt pad which seals the pigments.  You can then stamp using a permanent ink.  What you can't see in this scan is the depth and shine created using this technique.  I added the bird and cage to complete the ATC.

Monday, December 5, 2011

Tim Tags - Days #2 & 3

I'm still trying to catch up with Tim's Tags for 2011.  I actually have the pair of deer die so I at least had the central image.  I used some printed music velum over a basic tag for the background and a purchased (!) embellishment for the the deer.  The border is a Spellbinders die.
Day #2


Day #3

I really had to "stretch" on this one as I didn't have a bold sentiment stamp.  I guess the only thing that I did was make some kind of foliage  embellishment.  Onwards and upwards to Days # 4 and 5!!!!

Saturday, May 28, 2011

More Projects

Here are some samples of swaps from the last few months.


Alice in Wonderland ATC's


Cards for Troops


These are the cards I made for the "Cards for Troops" project for May. Each month, besides general BD, TY, etc., we are asked to send special seasonal cards such as 4th of July. I really enjoy making these each month - Usually around 30 0r so cards which are sent to a central location and then forwarded to troops stationed around the world for their use. Thanks to my stamping buddy Jan of Redrubberink for linking me up to this project. Of course, it's also a reason to add to my stash!!!!!


Sunday, March 6, 2011

Gone to "Pot!"

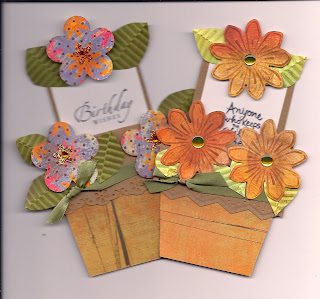
A few weeks ago I was surfing through the projects on splitcoast.com and found the tutorial for the Flower Pot Card -- it looked intriguing, so I gave it a try. Much to my dismay, it is actually not too difficult, just a little "putzy." I eventually made some with a group of friends, then with my friend Carole M. who came over earlier this week for a day of stamping.


This shows where the sentiment is stamped.

I think I'll make a few more for people who enjoy flowers and flower gardening.

Thursday, December 9, 2010

Collaborative Calendar for 2011

A few years ago my friend Bonnie and I decided to enlist a few other stampers to create calendars. This is what the six of us made for 2011.

January - Jane


February - Ashley


March - Maggi


April - Karen


May - Jane


June - Billie


July - Maggi


August - Bonnie


September - Billie


October - Bonnie


November - Ashley


December - Maggi


Everyone agreed that this was a fun project, even the two newbies who had never done this before and were a little taken aback that they would make 12 (!) of the same pages for each month!!! The calendars were bound using a Bind-It-All and mailed out to the participants. I hope we can continue this project for 2012.

Thursday, October 7, 2010

"E" Swap - Elegant Embossed Frames


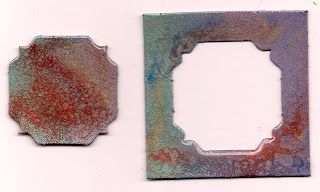
I finally am able to publish the scan of this fun swap that I made for my friend Carol. Due to "technical difficulties" (my IPhoto disappeared!), I could scan, but I couldn't transfer the image. Thank goodness for good tech support! The frames are made from small magnetic frames that I had received for free. To make them "elegant," I embossed metallic paper with various Cuttlebug folders and colored with alcohol inks. I ran the frames through the Xyron to put adhesive on the front of each frame, then placed each down on the embossed/colored paper. After carefully cutting out, I had a set of frames for Carol to display pictures of her grandchldren. This was a fun project. Now if I can only get some more frames!!!!!


Sunday, August 29, 2010

Swapping with SEWisconsin Group


I finished up my "assignments" for the August swaps today. Here are the scans and brief descriptions.

Open Wings

I love this central image - reminds me of the '60's and '70's! Linda will find a little surprise when she receives it!

August Layout

Each month we have a layout challenge. I'm obviously in an "autumn" mood!!


Tunnel Card

This is a view of the inside - hard to see as there is a lot of shimmer.

This is the closed version - looks like a "regular" card until it's opened. At first I was really challenged by this, but once I "googled" and followed the process, I realized how easy it is. The flower is made with the Tim Holtz Sizzix flower die. What you don't see is the dimension on the inside. I hope Linda likes the cards I'm sending to her!!!!

Saturday, August 28, 2010

August Shoebox Challenges

My stamping buddy Bonnie has a wonderful blog - Google Craftiblog to check it out - and a few of her internet friends occasionally send her craft items as a challenge to see what she can do with whatever they send her. One gal sent along an envelope of items which Bonnie shared with us in July. Our challenge was to use the materials and bring the finished item(s) to August Shoebox Night. Here's what I finally finished - I had the basic item stamped for our meeting and made some final changes.

Tri-fold Manilla Tag and Acetate

First I colored the tag with Distress Inks including silver and gold. I stamped the sentiment twice, once on the card base and again on the acetate. I colored the acetate with Sharpie markers, trimmed the acetate and adhered to the center, slightly off side to create some depth. The trees were stamped on either side and embellished with Flower Soft. The metallic leaves were found at Michaels, a package of about 40 for $1!!!

Large Manilla Tag

The tag was colored with inks, then I stamped the central image (one of my favorites!). I masked the image and stamped the top and bottom with a marbelized background stamp and added the embellishments to the bottom and fibers to the top.

(Yet) Another Fall Card
The central image is acetate run through the CB using an embossing folder. I then colored using Alcohol Inks. The tag is from Spellbinders, and I used a $1 stamp for the sentiment, adding gold peel-offs instead of ribbon. Simple and fun to make.

Another Use for a Tag and Acetate

I received an invite to a SU party and really liked one of the cards on the postcard, so I used it as a model for this card. The leaf is acetate inked up and cut with the large CB maple leaf. A scrap of hand decorated paper is used for the background behind the tag.

August Shoebox


August Shoebox Card

A small group of friends has been getting together for an evening of fun - making cards, chatting, and having fabulous dessert! This month we made only three cards (Ashley had to take her dog to the vet, and my stamp scrubber leaked onto the card base!) But we did have fun, celebrated Bonnie's BD with a luscious lemon pie (thanks, Chrissy!) and also shared some challenges (more on this in a later post.) So, here's our new cards - lots of ideas for you stampers.


JANE'S PRETTY IN PINK BD CARD

Jane (who is brand new to stamping!) helped us create this lovely BD card using reversible cardstock, a border punch, and a couple of dollar stamps. The dragonfly has jewels on the body and shimmery highlights on the wings. This will probably be Kada's card for BD #3 (but don't tell her!)

Bonnie's Distress Ink Trees and Beaded Embellishment

Bonnie always comes up with some lovely ideas and combined a tutorial using Distress Inks from GinaK's Stamp TV videos and an idea for a simple but gorgeous embellishment - beads and a long pin. Be sure to check out Stamp TV - lots of wonderful ideas - great videos!!!

Chrissy's Masculine Card

I just love this card - monochromatic cards are so striking. We distressed the white paper used for the stamped images with Distress Inks, then stamped in black. Thank goodness Chrissy cut all the pieces for us!!! I have two BIL's who have BD's coming up - both would like this card. Now I have to decide who gets it!

Next month we will make Ashley's card and mine which didn't get made this month. A special thanks to Chrissy who was hostess and made the delightful lemon pie.

Sunday, August 1, 2010

July Shoebox

My friend Bonnie and I have been getting together on a regular basis to make cards, eat dessert, and "gab." She recently was able to find a job after being laid off for quite while, and she has made some new friends who are interested in making cards. Bonnie called the group "Shoebox" because each of us designs a card and brings all of the materials for each of the others to make the card. We added a new member, my friend Chrissy, who attended for the first time in July. Here's what we made:


Chrissy's Happy Birthday


Jane's Levis Inspired Card

You can tell that Jane is very detail oriented. She also paints Christmas ornaments.


Bonnie's Elegant Lady


Ashley's Birthday Card

I haven't colored in the candles yet.

Reverse Nestabilities

This is the technique card I brought in my shoebox. Rather than layer elements on top of each other, they are layered underneath. I love using the Spellbinders Nestablilies dies. Unlike punches, they will last forever!

And the evening concluded with a decadent chocolate peanut butter pie!!!! Thanks, Ashley, for hosting, and also to everyone else who brought projects.

Tuesday, February 9, 2010

Book Study

In one of my on-line groups we are trying techniques from the book Paper Transformed by Julia Andrus. My friend Carol Sweeney has been our leader/cheerleader for this project, and she posts her samples with comments on her blog. Check out her blog for more information:

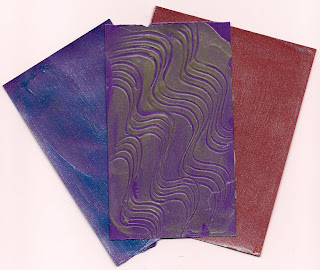
I have been keeping up with the techniques and have finally posted my results. The first technique was Luminous Paste.

These are samples of what it looks like.
These are samples of what it looks like if you don't follow directions, in this case, use matte instead of glossy medium!
And this is the serendipity part - the paper towels used for clean up coated with glossy medium!
-------------------------------------------------------------------------------------------------
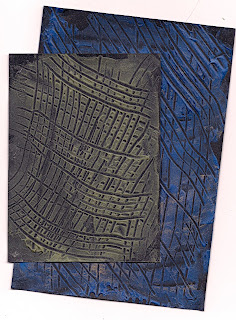
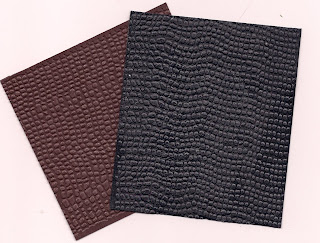
Technique #2: Faux Leather
This was a simple but beautiful technique - glossy medium on dark paper, let dried, then run through the Cuttle Bug using the mesh folder!!!!
-------------------------------------------------------------------------------------------------
#3 - Cosmos Paper
Because the directions called for a heavier CS, I used some "naked" die cuts. After inking with pigment ink, a couple of layers of ultra thick embossing powder were applied followed by some copper Perfect Pearls. It really looks like metal.
--------------------------------------------------------------------------------------------
#4 - Pearly Mottled Paper

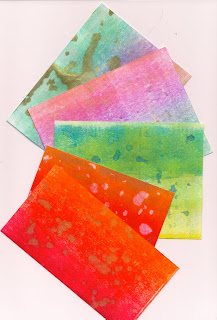
I have to admit that I had trouble with this one and found out that others did too. It all depended on the paper and the application of the water. The top sample was my first attempt - too much water!! The next one didn't have enough, but I got better with #3. I tried glossy paper for the fourth - the water removed the dye ink. The last sample was made on a piece of file folder, and it turned out the best of all.